Embracing the Healthier Twist: Why Bake Your Falafel?
Falafel, the beloved Middle Eastern street food, has captivated palates worldwide with its crispy exterior, tender herb-infused interior, and a delightful explosion of flavor. Traditionally, these savory patties or balls of ground chickpeas, herbs, and spices are deep-fried to achieve their characteristic golden crispness. While undeniably delicious, the deep-frying process, particularly in restaurants where oils are often reused and of lower quality, has become a significant concern for health-conscious individuals. The very thought of inflammation, digestive distress, and the detrimental effects on heart health and skin can be a major deterrent.
This is precisely where the innovation of
baked falafel shines. By opting for baking over deep-frying, we transform a potentially heavy, oil-laden dish into a remarkably healthy, high-protein, and often gluten-free culinary delight without compromising on taste or satisfaction. Baking significantly reduces the fat content, making your falafel a lighter, more heart-friendly option. It preserves the vibrant flavors of the fresh herbs and spices, allowing them to truly sing, and still delivers a satisfying texture that can be incredibly crispy on the outside while remaining moist and flavorful within. It's a testament to the fact that you don't need excessive oil to enjoy the authentic essence of this timeless dish. Curious to dive deeper into the health benefits? Explore
Why Baked Falafel is Your Healthier & Tastier Choice.
Unveiling Authentic Falafel: Ingredients and Texture Secrets
To create truly authentic and delicious
baked falafel, it's worth understanding the traditional approach to ingredients and preparation. Many home recipes often deviate from the "real deal" for convenience, but incorporating a few authentic secrets can elevate your homemade falafel to extraordinary levels.
The cornerstone of authentic falafel is undoubtedly the chickpeas. While canned garbanzo beans are a common shortcut in many recipes, the traditional method calls for
raw, dried chickpeas that have been soaked in water for at least 24 hours. This crucial step is the key to achieving the distinctive crumbly, yet cohesive, texture of true falafel, vastly different from the mashed-potato-like consistency that often results from using cooked or canned chickpeas. Soaked raw chickpeas also bind more effectively without the need for additional binders like eggs or large amounts of flour, making your falafel naturally more authentic and often gluten-free.
Beyond the chickpeas, the flavor profile is paramount. Fresh herbs are non-negotiable, with a generous amount of fresh parsley leading the charge, often complemented by cilantro. Fresh garlic, finely minced, adds a pungent depth, while ground cumin and coriander provide the warm, earthy notes that are characteristic of falafel. A touch of salt enhances all the flavors. Interestingly, many truly authentic recipes omit eggs entirely, relying on the natural starch and binding power of the raw, soaked chickpeas, often aided by a small amount of baking soda. Baking soda not only helps with binding but also contributes to a lighter, airier texture. Some recipes might use a tablespoon of flour (which can be easily substituted with chickpea flour or another gluten-free alternative if needed) to further aid binding, especially for baked versions, but the goal is to minimize its presence to let the chickpea and herb flavors shine.
The preparation process itself is vital for texture. After soaking, the chickpeas, along with the fresh herbs, garlic, and spices, are typically pulsed in a food processor until coarsely ground, not smooth like hummus. This coarse texture is what gives falafel its characteristic bite. Onions, often finely chopped and sometimes squeezed to remove excess moisture, are then mixed in. Traditionally, expert falafel makers use a meat grinder for the perfect texture, but a food processor can achieve excellent results with careful pulsing.
Crafting Your Perfect Baked Falafel: A Step-by-Step Guide
Creating your own batch of healthy, high-protein
baked falafel is a rewarding experience. Here’s a detailed guide, blending traditional insights with practical baking techniques:
- Prepare Your Chickpeas (The Authentic Way): If going for true authenticity, start by soaking 1.5 cups of dried chickpeas in a large bowl of water for 24 hours. Ensure they are fully submerged, changing the water once or twice if possible. After soaking, drain and rinse thoroughly. If opting for convenience, use 2 (15-ounce) cans of garbanzo beans, rinsed and thoroughly drained.
- Aromatic Foundation: For roughly ¼ cup of chopped onion, wrap it in a clean cheesecloth or paper towel and squeeze out as much moisture as possible. This prevents your falafel from becoming soggy. Mince 3-4 cloves of garlic.
- The Flavor Blend: In a food processor, combine your drained chickpeas (raw, soaked or canned), the squeezed onion, ¼ - ½ cup chopped fresh parsley (and optionally ¼ cup fresh cilantro), minced garlic, 1-2 teaspoons ground cumin, ½ teaspoon ground coriander, ½ teaspoon salt, and ¼ teaspoon baking soda.
- Pulse to Perfection: Process the mixture using short pulses until it is coarsely pureed. The texture should be somewhat crumbly with visible pieces of chickpeas and herbs, not a smooth paste. Over-processing will make your falafel dense. If using canned chickpeas and you feel the mixture is too wet, you can add 1 tablespoon of chickpea flour (or a gluten-free all-purpose flour) to help bind, though often the baking soda and resting time are sufficient.
- Rest and Shape: Transfer the mixture to a bowl. Mix thoroughly. Shape the mixture into 1.5 to 2-inch patties or balls. For the best texture and to prevent crumbling, let the shaped falafel stand for at least 15-30 minutes, or even chill them in the refrigerator for an hour. This resting period allows the flavors to meld and the mixture to firm up.
- Preheat and Prepare for Baking: Preheat your oven to 400 degrees F (200 degrees C). Lightly grease a baking sheet or line it with parchment paper. For an extra crispy crust reminiscent of deep-frying, consider searing your patties first.
- The Searing Secret (Optional but Recommended): Heat 1-2 teaspoons of olive oil in a large, oven-safe skillet over medium-high heat. Once hot, carefully place the falafel patties in the skillet (without overcrowding). Cook until golden brown, about 2-3 minutes per side. This step creates a fantastic initial crust.
- Bake to Golden Goodness: If you seared them, transfer the skillet directly to the preheated oven. If not searing, arrange the falafel patties on your prepared baking sheet. Bake for 15-20 minutes, flipping halfway through, until heated through and golden brown. The exact time will depend on their size and thickness.
For more detailed instructions and helpful visuals, check out
Easy Baked Falafel Recipe: Yummy, Crispy & Simple Steps.
Serving Suggestions & Customization for Your Gluten-Free Feast
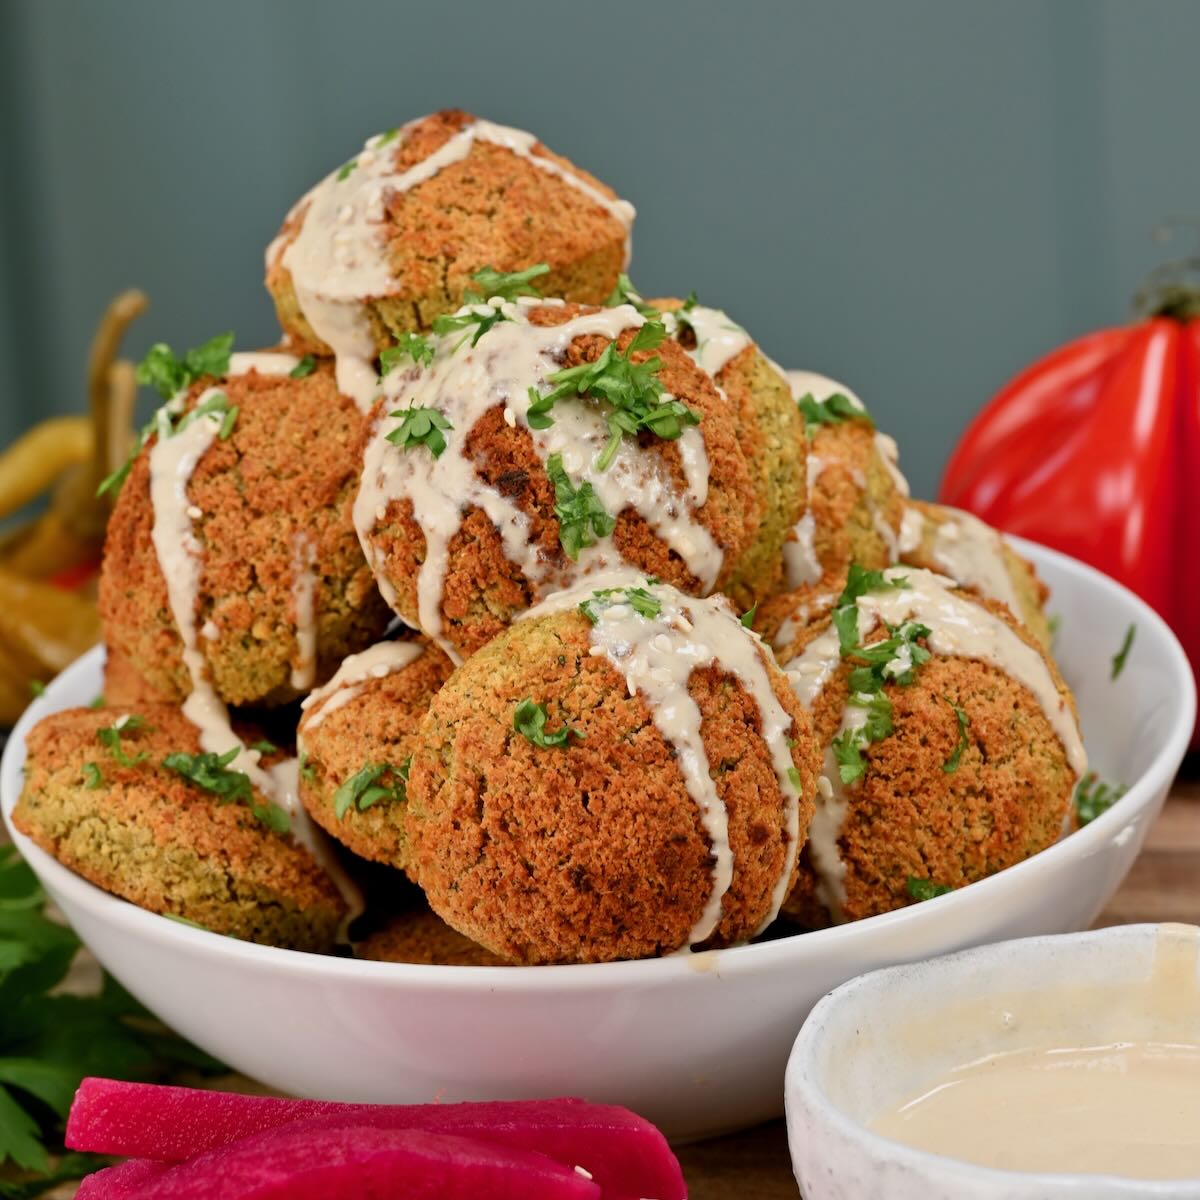
Once your golden-brown
baked falafel emerges from the oven, fragrant and inviting, the real fun begins: serving and customizing! The beauty of falafel lies in its versatility, making it a perfect fit for a variety of meals and dietary needs.
For a classic, authentic experience, serve your falafel in warm pita bread (whole wheat or gluten-free pita works wonderfully), generously slathered with creamy tahini sauce. Add crisp shredded lettuce, sliced ripe tomatoes, and tangy pickled radishes or cucumbers for a burst of freshness and crunch. A dollop of homemade tzatziki or a fiery s'chug can also elevate the flavors beautifully. This combination offers a satisfying balance of textures and tastes, making it clear why falafel has been a street food staple for centuries.
Beyond the traditional pita sandwich,
baked falafel is an incredibly versatile ingredient.
- Falafel Bowls: Create vibrant and nutritious falafel bowls by serving them over a bed of mixed greens, quinoa, or couscous (or cauliflower rice for a grain-free option). Top with a medley of chopped vegetables like bell peppers, cucumbers, cherry tomatoes, and a drizzle of lemon-tahini dressing.
- Salad Toppers: Crumble falafel over your favorite salad for a substantial protein boost, turning a simple side into a hearty main course.
- Appetizer Platter: Serve them as a delicious appetizer with a variety of dips like hummus, baba ghanoush, or a spicy harissa aioli.
- Meal Prep Powerhouse: Baked falafel keeps well in the refrigerator for several days, making it an excellent component for healthy meal prep throughout the week.
One of the great advantages of focusing on authentic, raw chickpea-based falafel is its natural suitability for a
gluten-free diet. Since chickpeas are inherently gluten-free, by ensuring no gluten-containing flour is added (or by using a gluten-free alternative if a binder is desired), you're creating a delicious and safe option for those with gluten sensitivities. Furthermore, falafel is a fantastic source of plant-based protein from the chickpeas, making it an excellent choice for vegetarians, vegans, and anyone looking to incorporate more wholesome protein into their diet. You can even experiment with other legumes like mung beans (as suggested by Registered Dietitians) for a unique twist and different nutritional profile.
Conclusion
From the bustling streets of the Middle East to your healthy home kitchen,
authentic baked falafel offers a culinary journey that is both flavorful and incredibly nutritious. By embracing the power of baking over deep-frying and understanding the secrets of traditional preparation—like using raw, soaked chickpeas—you can create a dish that is not only healthier and high in protein but also genuinely captures the essence of this beloved classic. Whether you serve it in a pita, atop a vibrant salad, or as a standalone snack, your homemade, gluten-free baked falafel is sure to become a guilt-free favorite. So, roll up your sleeves, gather your ingredients, and prepare to delight your taste buds with this wholesome and utterly delicious creation!